Saturday 25 May 2013

12 Top Tricks To Make Windows 8 Fun


Hello friends, today we are gonna discuss about  top tricks to make you windows 8 fun, manny of you would have updated to windows 8 and are enjoying it like me, but this article will help you to know your windows 8 better. windows 8 is made for speed . its a fact that windows 8 is much faster, more responsive and smoother.those who are using this operating system are enjoying the experience.


Here are some tricks which will make windows 8 much more interesting. and if you are using windows 8 on a touch screen device it will be a fun experience.

1. Overview Your Entire Start Screen By Semantic Zoom
If you’re using a touch screen, squeeze the Start screen with two fingers to receive a bird’s eye view of your entire screen contents. This is useful when you have a lots of apps/programs installed and want to see all the apps without scrolling the contents up and down.

2. Use Windows Hot Corners
The corners on your screen provides you to different Windows features. Below, is a brief explanation of each of these corners.

Bottom Left-hand corner of the screen will allow you to access the Start screen, if you’re in the Start screen and have the Desktop open, this corner will open the Desktop from the Start screen.
Quick Tip: Right-clicking in the left hand corner will open the power user menu.

Moving the mouse to the top-left corner and then down will display all the apps running on the computer. Clicking and dragging any of these apps to the left or right-hand side of the screen will snap that app to that side of the screen. Each of these open app icons can also be right-clicked to close or snap.

On the full right-hand side of the screen will be given access to the Windows Charms.

3. Why Close Buttons Are Hard To Find?
Closing a program seems easy, but you might have noticed that close buttons are hard to find in Windows 8. That’s because Microsoft encourages us to run apps in the background where they’ll take up minimal resources, but still be accessible at any time!
Still, anyway, you can close an app 1) by dragging it from top to bottom, or 2) using Alt+F4 keys or 3) using the task manager.

4. Find Anything Using Power-packed Search
Search looks power-packed. Start typing anything you are looking for in the search bar and it will search in the apps, files/folders and emails too.

5. Windows 8 God Mode Folder?
Create a magic folder which contains all the Windows 8 setings and hidden tweaks:
1. Create a “New Folder” by right-clicking on empty spot in any directory, preferably Desktop.
2. Give the folder this name: All Settings .{ED7BA470-8E54-465E-825C-99712043E01C}
3. Open the folder to see a complete list of settings.
But be careful for using advanced settings, don’t change them unless you are an expert.

6. PC Slowed Down? Get Fresh Windows 8 Easily in Minutes!
In Windows 7 and previous versions, you had to format and reinstall the entire OS to get a fresh feel. This was a tiresome and time-wasting process. Windows 8 provides an in-built way to refresh your computer!

In order to perform the Windows 8 refresh, go to Settings and click the Change PC Settings tab near the bottom. Select the General tab and find the “Refresh your PC without affecting your files” section near the middle (you may also select “Remove everything and reinstall Windows” to get the true factory settings treatment). Select “Get started” and press “Refresh.” After a few minutes the PC will restart, and you will have a fresh copy of Windows 8.

7. Shut Down Shortcut:
Windows 8 hides the Power button in the Settings menu, so it takes multistep process just to shut down your PC. But you can pin a Shutdown button right onto the bottom of your desktop using following trick:
Create a shortcut on your desktop (right-click, go to New, then Shortcut). Enter “shutdown /s /t 0″ (with no quotes, and, yes, that’s a zero not an “O”) as the location of the item, and press Next. Now name the shortcut (prefereably “Shutdown”) and press Finish.

Right-click the shortcut, and navigate to Properties. Choose Change Icon in the Shortcut tab, and then OK to leave the warning box. Choose an icon of your choice from the list. In the screenshot above, you’ll see we chose a Power button.
Right-click the shortcut again, and select Pin to Start. You can place the icon on your Start screen wherever it’s convenient. Clicking it will instantly shut down your computer.

But which one is the easiest and fastest way to shutdown? Hit power button on your computer!

8. Classic Start Menu
This is the thing many people keep missing on Windows 8. If you want to anyway want the Start menu on Windows 8,
ViStart, a free utility will do a good job.

9. Fun Way To Password-protect
Windows 8 enables you to create a picture password, where you choose an image, then draw on it in a combination of taps, lines and circles – only someone who can reproduce this pattern will be able to log on. Select Win + I > More PC Settings > Users > Create a Picture Password to give this a try.

10. Mount ISO files in Windows 8
Right-click it in Explorer, click Mount and you can view it as a virtual drive, launch the files it contains, or add more if you like.

11. Windows 8 Recovery Options
Windows 8 provides useful, advanced options to recover when a disaster occurs.

12. List of Most Important Hotkeys
Here is a list of hotkeys to make your Windows 8 experiece even a fun:

Win : switch between the Start screen and the last-running Windows 8 app
Win + C : displays the Charms: the Settings, Devices, Share and Search options
Win + D : launches the desktop
Win + E : launches Explorer
Win + F : opens the File Search pane
Win + H : opens the Share pane
Win + I : opens Settings
Win + K : opens the Devices pane
Win + L : locks your PC
Win + M : minimises the current Explorer or Internet Explorer window (works in the full-screen IE, too)
Win + O : toggles device orientation lock on and off
Win + P : switch your display to a second display or projector
Win + Q : open the App Search pane
Win + R : opens the Run box
Win + U : open the Ease of Access Centre
Win + V : cycle through toasts (notifications)
Win + W : search your system settings (type POWER for links to all power-related options, say)
Win + X : displays a text menu of useful Windows tools and applets
Win + Z : displays the right-click context menu when in a full-screen app
Win + + : launch Magnifier and zoom in
Win + – : zoom out
Win +  , : Aero peek at the desktop
Win + Enter : launch Narrator
Win + PgUp : move the current screen to the left-hand monitor
Win + PgDn : move the current screen to the right-hand monitor
Win + PrtSc : capture the current screen and save it to your Pictures folder
Win + Tab : switch between running apps

So i m sure then this article will better your windows 8 experience.
Recommend us on google before leaving this page.
Thank you :)

Friday 24 May 2013

Applying a Support Package Stack


Applying a Support Package Stack
 .

Step-by-Step process of Importing Support Packages into ECC6 EHP4 System

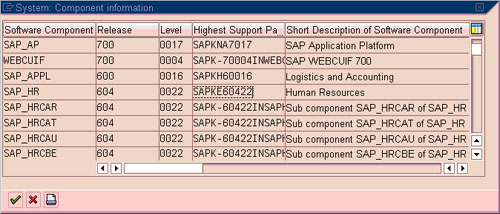
In this blog we look at a step-by-step procedure to import HR support packages (HR Sp 16 to 20) & (EA-HR 16 to 20) into a ECC6 system with EHP4.
The most important part of the installation is the preparation work. This is absolutely critical that side-effect notes, relevant basis notes and patches are applied before applying the support packages (see appendix). 99% Preparation, 1% perspiration!
Remember you can only download SP’s from Solution manager (well sort of). What SolMan really does is generate the link for you to download the SPs. Once you have the link generated, you can just call the link from your browser independent of SolMan (see appendix on process).
Another point I want to highlight is in this scenario, we are simply updating a subset of Support packages i.e HR support packages and not the Support Pack ‘Stack’. Whilst it is recommended to apply the stack, this is not always practical and feasible due to resources, availability to test and other complexities in large SAP landscapes.
1.1       Check all pre-requisites are met, e.g file system space, SAP notes, locked users, etc. See appendix below for checklist of what to do.
1.2       Login to Client 000 with a Super User (SAP_ALL/SAP_NEW)
1.3       Ensure all the required SP’s have been downloaded from the SAP Marketplace and have been unzipped/uncarred into the …./EPS/in folders. The process of identifying which SP’s to load and the interdependencies is a separate task on its on and usually conducted in conjunction/direction of the application/functional team
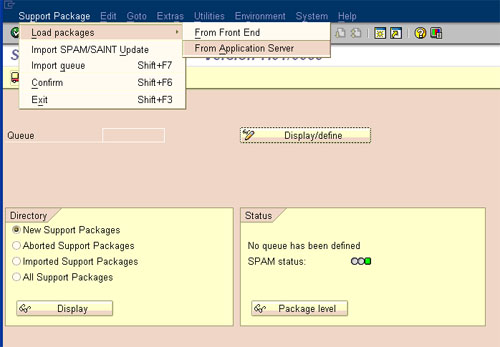
1.4       Load SP’s from App server (you must first download the *.SAPCAR files and extract it in …usr/sap/trans/EPS/in
1.5       Define Queue. – Essentially what you are doing here is telling SAP which SPs you want to import. It is intelligent enough to calculate interdependencies.
Load the SP’s from the Application server (after you have unzipped them into the ../EPS/in folder). Pick the highest SP number. (It will automatically included other SP’s or dependencies.). If you are importing SP for different modules e.g HR, Finance, etc, then you may need to build the queue and change the settings to “Calculation for a Vector of components”.
Queue calculation for a vector of software components:
The Support Package queue calculation takes place for multiple software components based on the target Support Package level that has been defined for each software component (see Defining a Queue Based on Multiple Software Components).

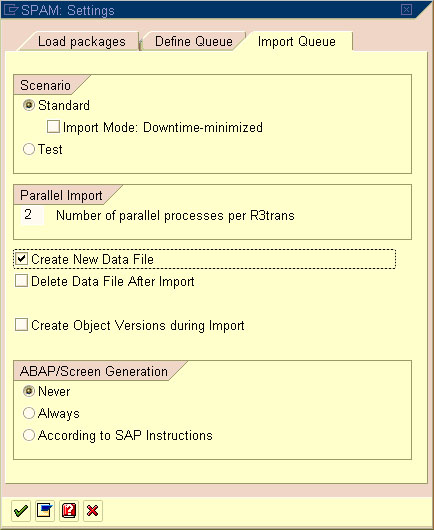
1.6       Check SPAM settings:

You can schedule more parallel processes if you like and if you system can support. These are the typical settings I use when importing initially into a development system
Check if the SPAM settings are as follows :
Section Import queue
Create new datafile = Yes (only in DEVELOPMENT)
Delete data file after import = No
Section ABAP/Screen Generation
Generate screen = Never

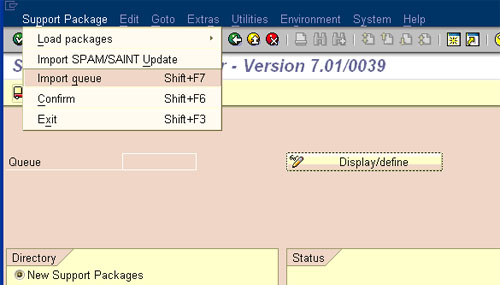
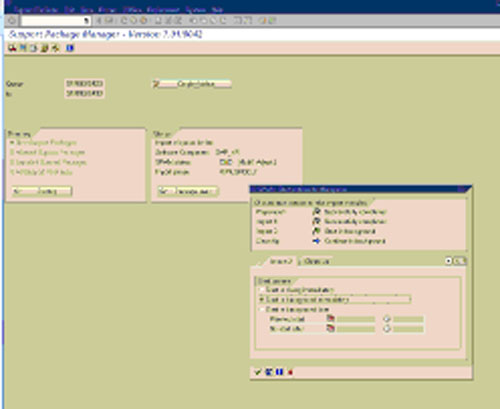
1.7       Import Support Packages (Shift + F7)

This step onwards basically kicks starts the SP import process. From now onwards, there is no going back (well almost).
Please refer to link on SAP Help below for known errors during import:
Generally I Run phase 1 in ‘dialog mode’ and all other phases in ‘background’ mode
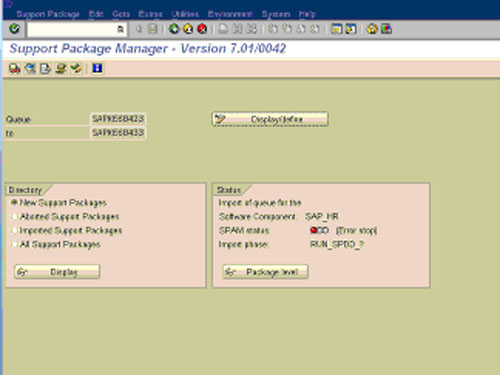
These are the various phases the SPAM goes through during the import process. You will see the phases change in the ‘Status’ section in tcode SPAM:
Preparation Module
1.      PROLOGUE
This phase checks whether you are authorized to import Support Packages.
2.      CHECK_REQUIREMENTS
This phase checks various requirements for importing a Support Package, for example, whether the transport control program tp can log on to your system.
3.      DISASSEMBLE
This phase unpacks files from the appropriate EPS parcels and saves them to the transport directory.
4.      ADD_TO_BUFFER
This phase places the queue in the transport buffer of your system.
5.      MODIFY_BUFFER
This phase prepares the transport buffer for correct processing of the following import phases.
6.      TEST_IMPORT
This phase performs a test import for the queue with the transport control program tp. The system checks whether there are objects that are in open repairs and that are overwritten during the import, or whether other conditions prevent the import of an object.
7.      IMPORT_OBJECT_LIST
This phase imports the object lists for the Support Packages in the queue into the system.
8.      OBJECTS_LOCKED_?
This phase checks whether there are objects that are overwritten by the import, and that are still in unreleased requests.
9.      ADDON_CONFLICTS_?
This phase checks whether there are conflicts between objects in the queue and any installed add-ons.
10.      SCHEDULE_RDDIMPDP
This phase schedules the transport daemon (program RDDIMPDP).
Import 1 Module
11.      CREATE_VERS_BEFORE
This phase generates versions of the objects that are contained in the Support Packages in the queue (if this option is set).
12.      SPDD_SPAU_CHECK
In this phase, the system checks if a modification adjustment is necessary (transactions SPDD/SPAU).
13.      DDIC_IMPORT
This phase imports all ABAP Dictionary objects in the queue.
14.      AUTO_MOD_SPDD
This phase checks whether all modifications to ABAP Dictionary objects can be adjusted automatically.
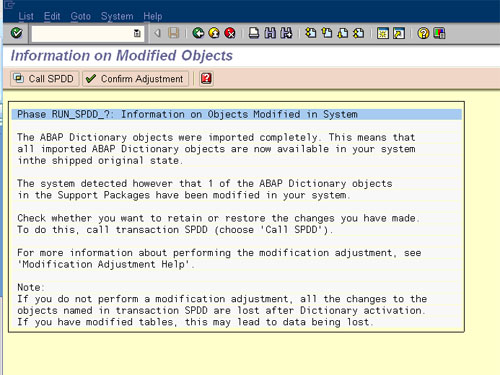
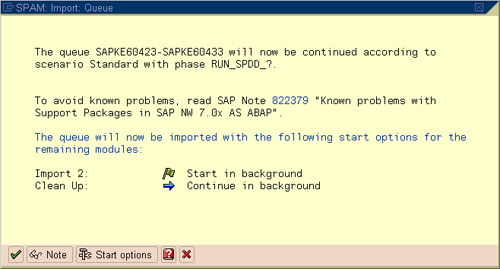
15.      RUN_SPDD_?
In this phase, you are asked to adjust your modifications to the ABAP Dictionary objects by calling transaction SPDD.
16.      LOCK_EU (only for import mode downtime-minimized)
This phase locks the development environment.
17.      INACTIVE_IMPORT (only for import mode downtime-minimized)
This phase imports program code and program texts in an inactive state.
18.      DDIC_ACTIVATION
This phase activates the imported ABAP Dictionary objects.
Import 2 Module
19.      IMPORT_PROPER
This phase imports all the Repository objects and table entries if they were not already imported in the INACTIVE_IMPORT phase. This is preceded by actions such as table conversion and activation of the name tabs.
20.      PREPARE_XPRA
This phase prepares the execution of the XPRAs and after-import methods.
21.      UNLOCK_EU (only for import mode downtime-minimized)
This phase unlocks the development environment.
22.      AUTO_MOD_SPAU
This phase checks whether modifications can be adjusted automatically.
23.      XPRA_EXECUTION
This phase executes the XPRAs and after-import methods.
24.      ABAP_GENERATION
This phase generates the runtime objects for the imported Repository objects (ABAP source texts and screens).
Clean Up Module
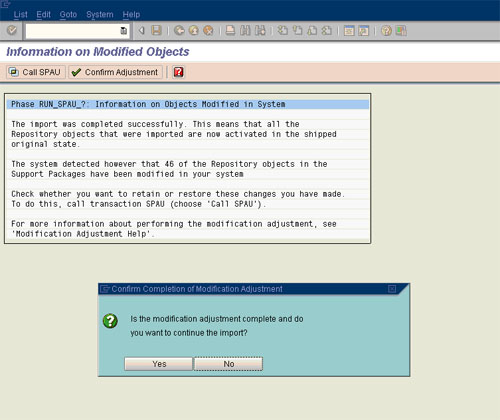
25.      RUN_SPAU_?
This phase prompts you to adjust your modifications to Repository objects by calling transaction SPAU.
26.      CLEAR_OLD_REPORTS (only for import mode downtime-minimized)
This phase deletes the obsolete versions of program code and program texts in the database.
27.      EPILOGUE
This phase completes the import. Among other things, it checks whether the queue has been processed completely.

1.8       Main Import Phases and Actions required.

In the following steps below, I  only highlight only the main phases and the necessary actions required. Generally if you have done your homework and checked and met all prerequisites, you should a relatively smooth import process.

1.8.1       SPDD Adjustment – Handover to Developer

SPAM -> Goto -> Status – Queue to confirm adjustment to proceed to next phase

1.9       SPAU Adjustment

After the SPDD  is completed, it will go through a number of phases and eventually pause at SPAU adjustment phase (RUN_SPAU). Now again, ask the developers to continue with the SPAU adjustments (This is only done in Development systems. For changes to take place in all downstream systems, transports are created and imported into e.g QA and PROD and usually after the SP’s are applied).
Once developers complete their SPAU adjustments successfully (be patience, this can take from several hours to a week or more depending on size of landscape and amount of customising), simply resume i.e Goto  Support Package -> Import Queue (similar to SPDD steps)

1.10       Tail end – EPILOGUE

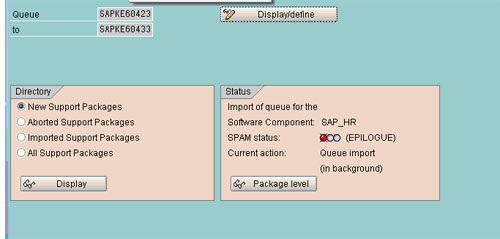
Finally, it all goes well, the last phase is the EPILOGUE as shown below. This should not take that long and once completed, you proceed to confirm (or complete) the import with the next step
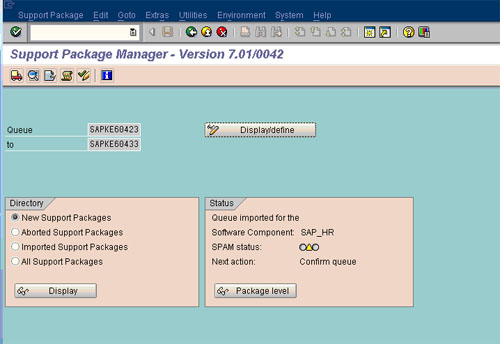
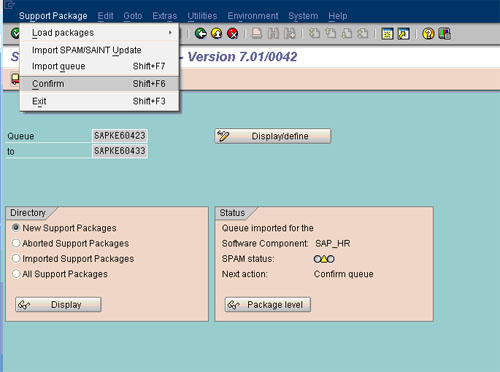
Once EPILOGUE completed, the Status will turn Yellow. You must then go to Support Packages -> Confirm (Shift F6) to close off or complete the SP implementation.

1.11       Lastly, CONFIRM queue

Method to confirm queue shown below.

2         Post Steps – SGEN

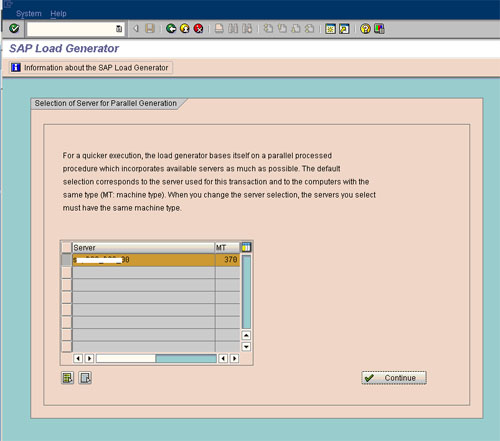
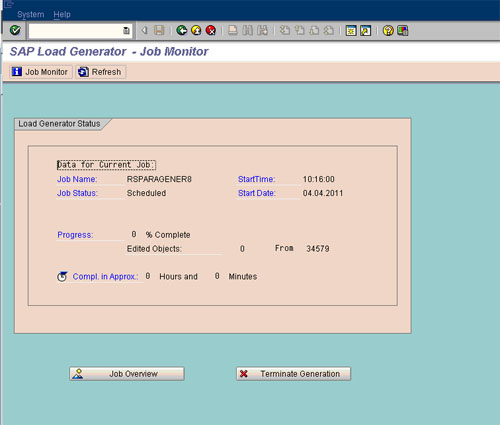
Once import is completed, proceed to run SGEN to recompile all the new imported objects before releasing the system. Steps shown below.
Run SGEN with options
Regeneration of existing loads
Only generate objects with invalid loads
Wait until finished !

Appendix  – Additional Info

2.1       Checklist before Import of SPs

This is my checklist but others may have more to add (or remove!)
  1. Confirm and sign-off the support pks and combination of SPs that will be applied and project/test team available for testing
  2. Verify all functional and cross-system dependencies are met. Must review and OSS note 822379 (netweaver 7 version)
  3. Enough Disk space and atleast 85% free space on sapdata filesystem
  4. Check if file system /usr/sap/trans/data and ../EPS/in  has free space, if not clean-up old support package data files or Pat files in EPS/in
  5. Post a system message & a login screen message indicating the outage (refer to procedure Applying Support Packages).
  6. Check if no tablespace is over 85 % full
  7. Verify if you have a recent backup., if not schedule a full on-line backup. If production, have a backup just before Support pkgs to be safe.
  8. Unpack all required SP’s and then load them into SPAM and verify that all queues are OK  e.g SAPCAR -xvf /sapcd/sp/XXXXXXX.CAR –V
9. Update Spam with latest version from Service marketplace. Also ensure binaries R3trans and tp are updated if necessary. If you are not sure, usually it will not hurt to update these anyway.
10. Define Queue and perform TEST import and report any SPDD/SPAU conflicts to project/developers

2.2       Using SolMan to download Support Packages

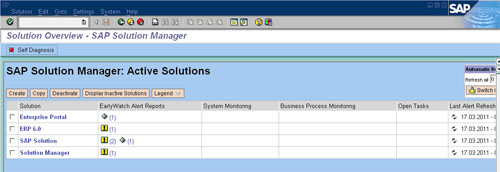
Call tcode  /nsolution Manager
Select the Solution ‘SAP Solution’ if you are going to download SP’s for ECC 6.0 SAP System for your environment.
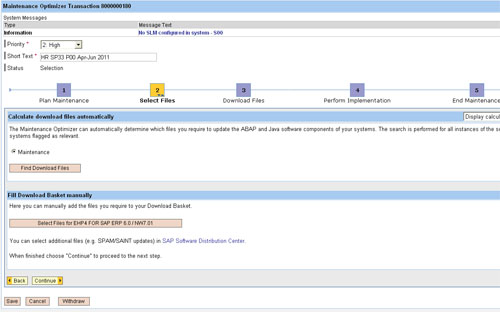
Create a new ‘Maintenance Optimizer’ or use existing
Here you can select the SP’s to download either manually and automate i.e Let SAP decide
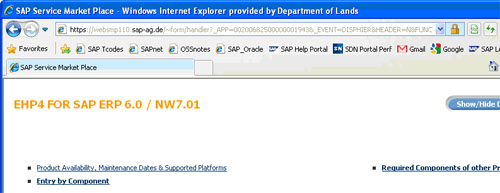
A Web browser window will pop up and you need to manually look for and select the e.g HR support pkgs.